

A model is a temporary object. Everyone treats it as a permanent one until the week it stops existing.
01Why the day it’s finished
It gets carried to a crit and comes back with a corner missing. It gets moved to the back of the studio to make room, and something heavy goes on top of it. It gets left over a holiday and a cleaner, entirely reasonably, throws it out. Sometimes nothing happens to it at all and it simply stays in a studio two hundred miles from where you are the weekend the portfolio is due.
None of that matters if you photographed it. All of it matters if you didn’t. By submission the photograph is the model: it is the only version the examiner will ever see, and it is the version that goes in the portfolio you’ll be showing at interviews three years from now.
The model is what you made. The photograph is what you keep.
So the rule is the boring one: photograph it the day it’s finished, before it has been anywhere or done anything. Not at the end of term when you’re collecting material; by then it has been handled forty times and it looks it.
02The fifteen-minute setup
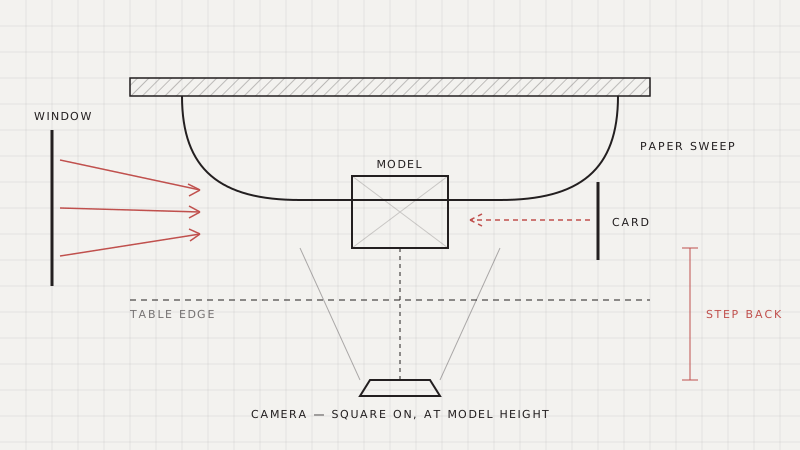
You do not need a studio, a light kit or anything you have to book. You need a window, a table and a sheet of paper bigger than the model.
-
Find a table beside a window
Daylight, and only daylight. An overcast day is better than a bright one: cloud is a softbox the size of the sky, and it will not throw a hard shadow across your building.
-
Curve one sheet of paper up the wall
Tape the top to the wall and let the bottom fall onto the table without creasing. That curve removes the horizon line behind the model, and it is the single thing that separates a photograph of a model from a photograph of a table.
-
Put a white card on the dark side
A sheet of A2 mount board propped opposite the window bounces light back into the shadowed elevation. Without it one side of the building goes black and reads as a hole.
-
Switch the studio lights off
Fluorescent ceiling light is green, daylight is blue, and a photograph lit by both is a photograph you cannot colour-correct afterwards. One light source, always.
-
Get the lens down to model height
Photographing from standing height gives you a view no one will ever have of the real building. Crouch until the camera is level with the model’s ground floor.
In practice
Wipe the table and shake the paper out first. Dust and cutting-mat crumbs are invisible in the studio and enormous in a photograph, and removing them afterwards costs an hour in Photoshop that you will not have in May.
03The three shots
Take three, in this order, before you take anything else. If you get interrupted after ten minutes you will still have a usable set.
-
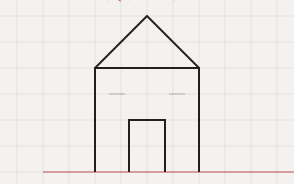 A — Elevation
The straight elevation
Square on, lens level with the model, the building filling the frame. This is the drawing shot: the one that goes on the page beside your elevation and lets someone compare the two. Keep the camera parallel to the model’s face or the verticals will lean.
-
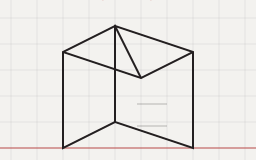 B — Three-quarter
Thirty degrees round, from above
Move round about thirty degrees and lift the camera a little. This is the shot that explains the massing: how the parts sit against each other, where the building meets the ground. It is almost always the one that ends up largest in the portfolio.
-
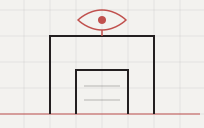 C — Eye level
Looking in, at eye level
Camera on the table, lens at the model’s ground floor, looking into a courtyard or down a street. This is the only shot that tells anyone what it would be like to be there, and it is the one most people never take.
Swipe →
Then take the same three again from the other side, and a handful of details: a junction you’re pleased with, a stair, a corner. Photographs cost nothing. Reshoots cost the model.
04Phone or camera
The honest answer is that the phone in your pocket is enough, and the reason has nothing to do with the lens. The best camera here is the one that is with you on the day the model is finished, because the alternative is not a better photograph — it is no photograph.
| What you use | Good for | The catch |
|---|---|---|
| Your phone | Everything, honestly. Use the 2× or 3× lens rather than the wide one and stand further back: the wide lens bows your elevations outwards. | Portrait mode blurs the back of the model as though it were a face. Switch it off. |
| A borrowed SLR | Low light, and prints above A3. You can also stop the lens down and keep the whole model sharp front to back. | Only worth the trip to the loan store if you already know how to use it. Learning on the day is how the day gets lost. |
| The school’s photo room | The final set, once the model is finished and you have an hour. Proper backdrop, proper lights. | Booked out from week eight onwards. Book it early or treat it as a bonus, never as the plan. |
Whatever you use: turn the flash off, hold still or prop the camera on something, and take more frames than you think you need.
05Where the files go
A photograph you cannot find in May is the same as no photograph. Move them off the camera roll the same evening, while you still know what they are.
Do
Copy them straight into the project folder, in a subfolder named 09-model-photos, with names like 2026-11-04_model-final_03.jpg. Keep the originals untouched and edit copies.
Don’t
Leave them on the phone until the portfolio deadline. Phones get full, get wiped, get replaced and get dropped down toilets, and the photographs are never the thing anyone backs up first.
Watch out
iCloud and Google Photos are not a backup. They are a mirror: delete the photograph on the phone by accident and it is deleted everywhere, quietly, within the minute. That is what check 06 — a second copy, somewhere else — is for.
Then do the boring last step: open the folder and look at them. Not on the phone — on the screen you’ll be laying the portfolio out on. It takes two minutes, and it is the only way to find out that the third shot is soft while the model is still standing on the table behind you.